You can create a Private App in your Zapier account for SupportSync. This will allow you to interact with SupportSync from Zapier and its many partners.
1. Go to https://zapier.com/developer/builder/
2. Click "Create a web builder app".

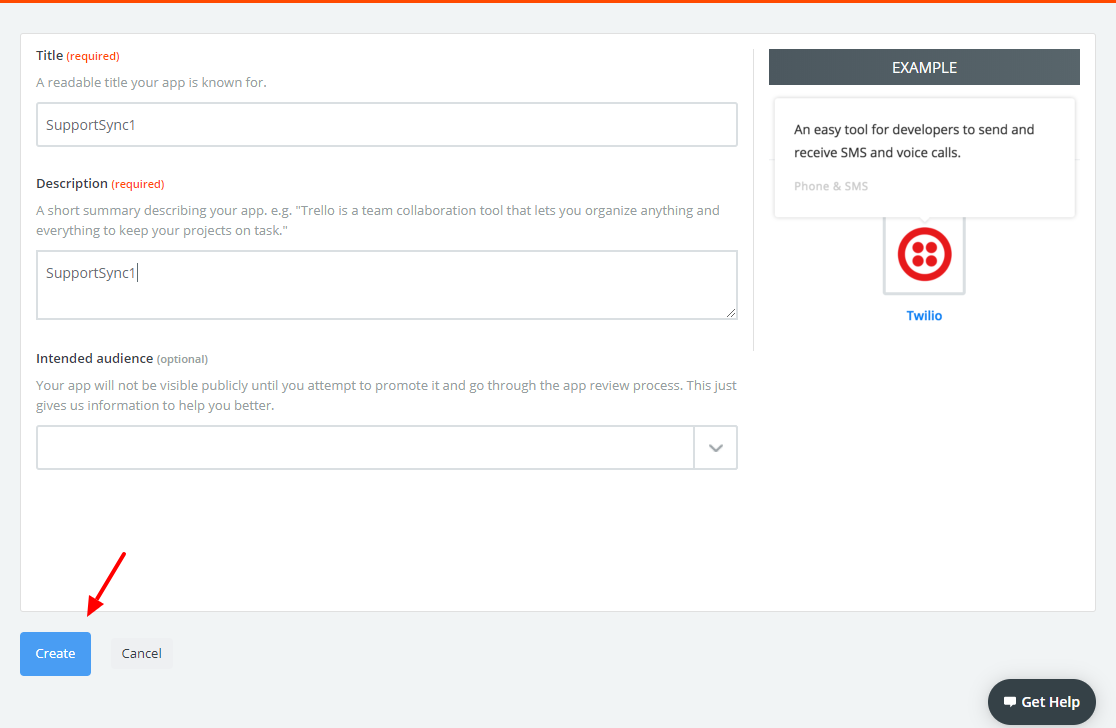
3. Enter the Title and Description and click "Create".
4. You can use the PNG file attached to this end of this article for the logo.
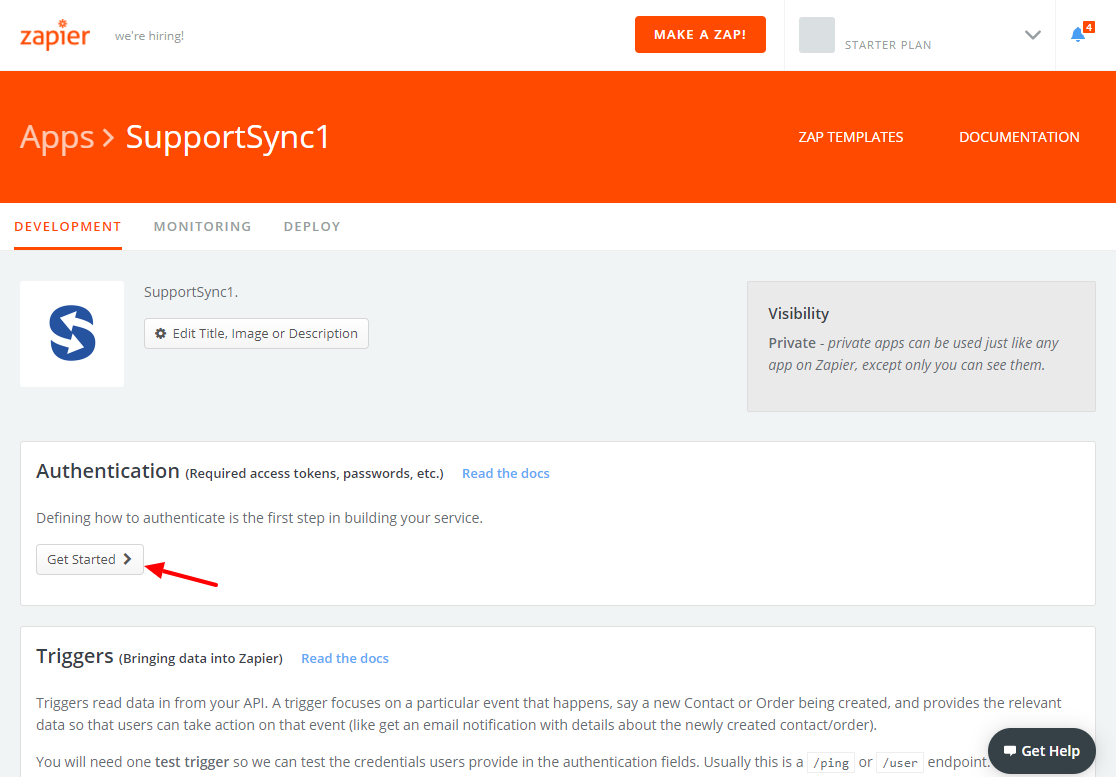
5. Next, Authentication:
a) Click "Get Started".
b) Click "Basic Auth".
c) Click "Next".
d) Click "Save".
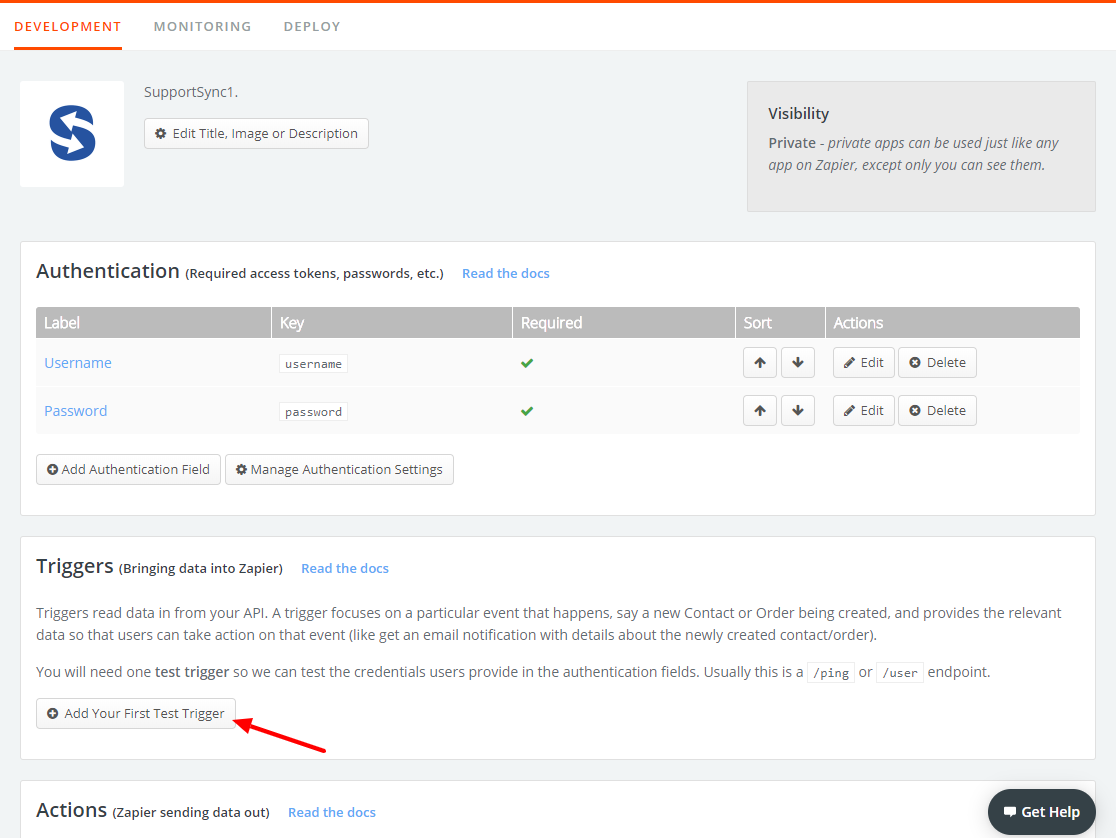
6. Add the first Trigger.
a) Click "Add your first test trigger".
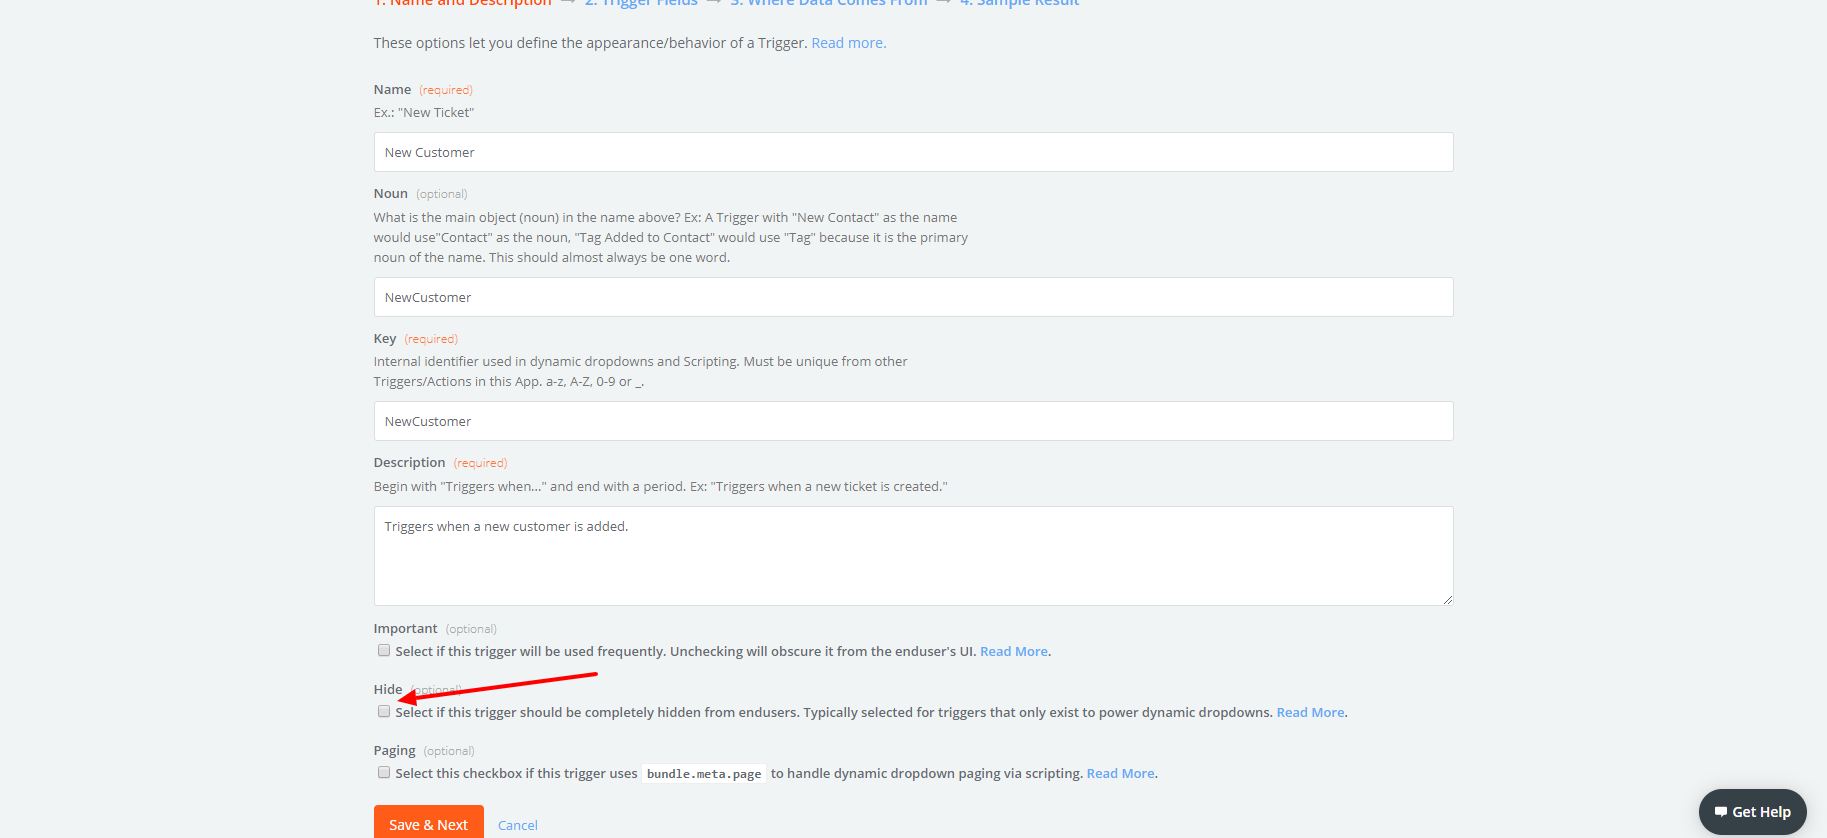
b) Enter the Name, Noun, Key, Description and deselect "Hide". Then, click "Next".
c) Click "Next".
d) Enter the following for "Poll URL":
https://{{your-sub-domain}}.supportsync.com/crm/api/zapier/Customers/GetCustomerList?StartRowIndex=-1&SortColumn=CustomerCreateDate%20DESC&PageSize=10&RequestId=0&SearchText=
e) Replace {{your-sub-domain}} with your brand's URL sub-domain.
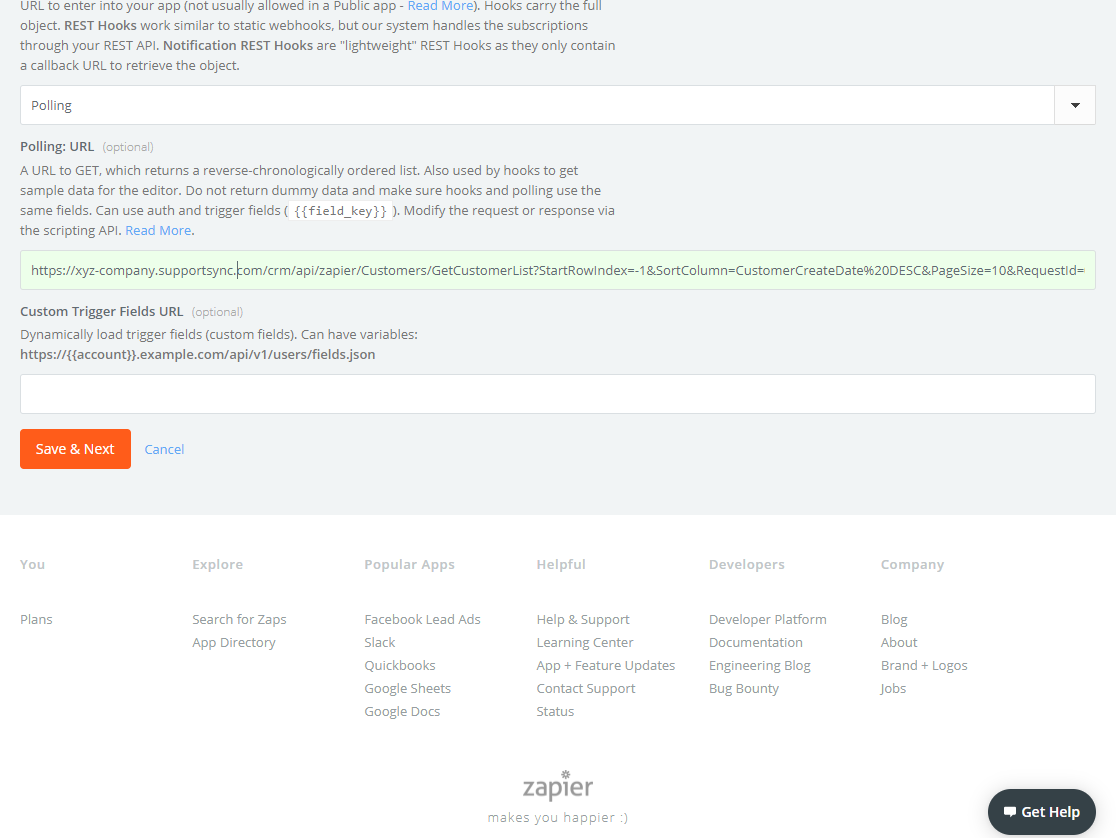
f) Click "Save".
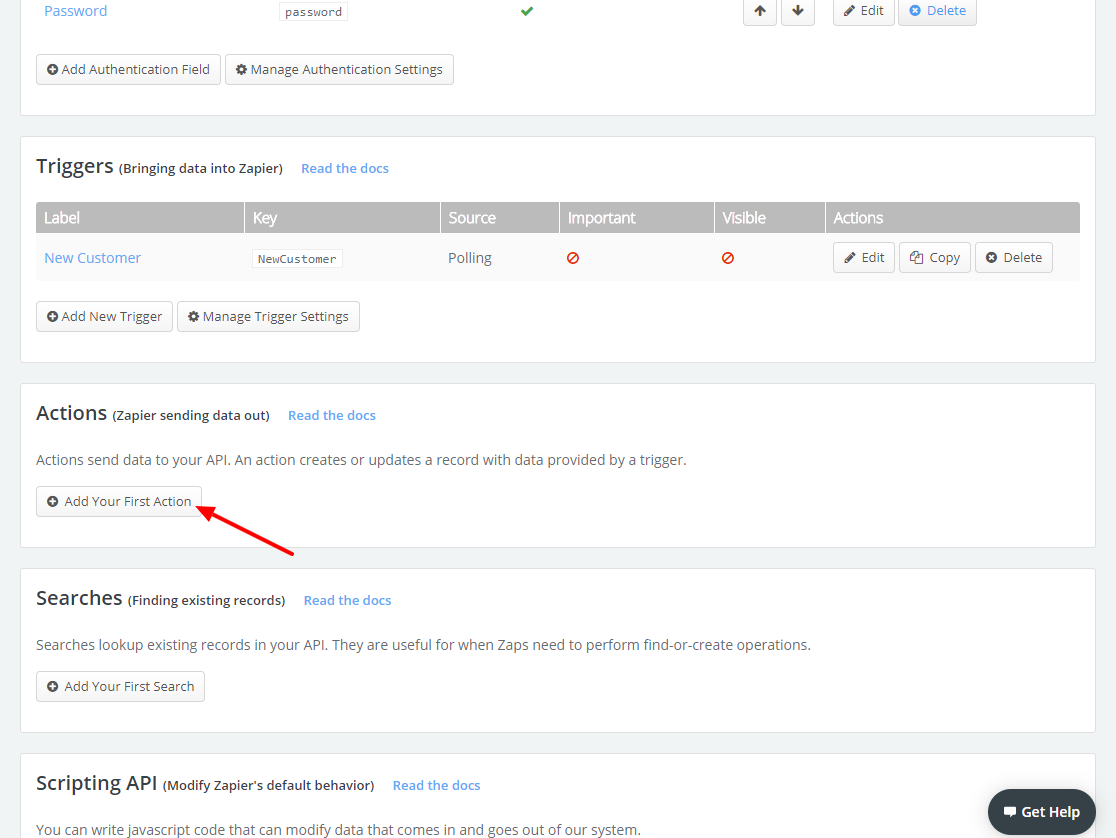
7. Add the first Action.
a) Click "Add your first action".
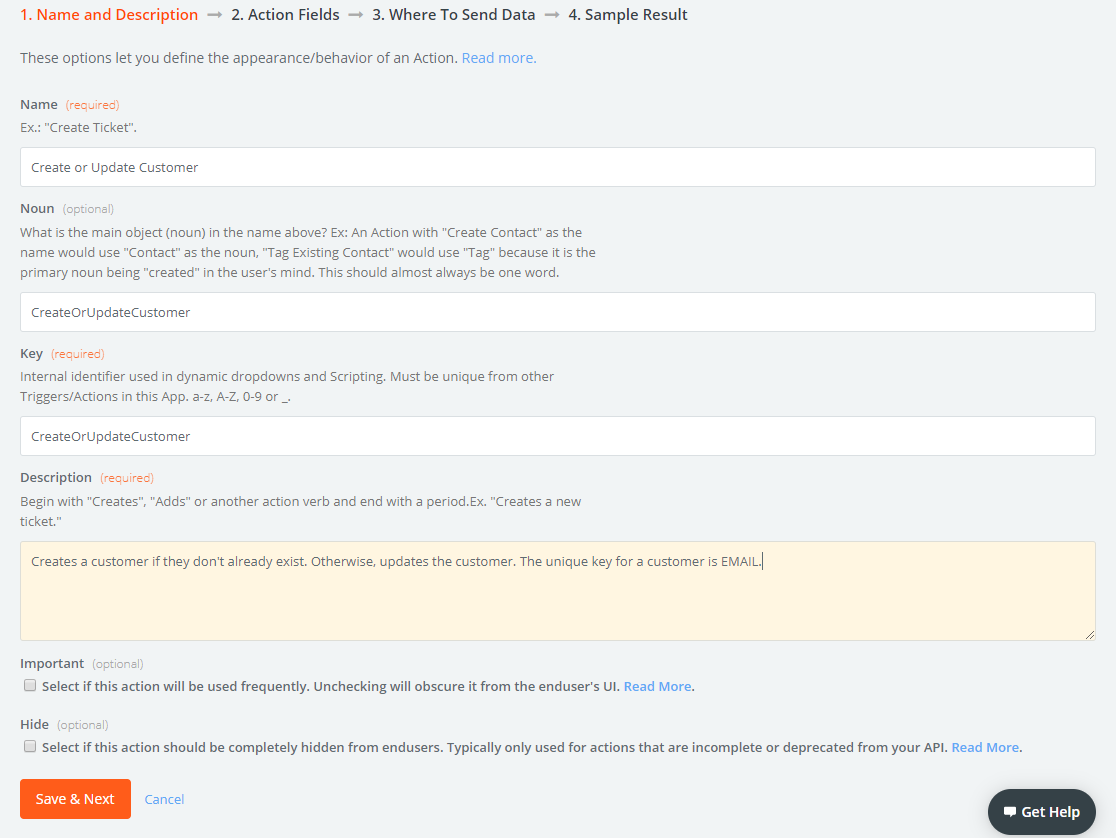
b) Enter the Name, Noun, Key, Description and click "Next".
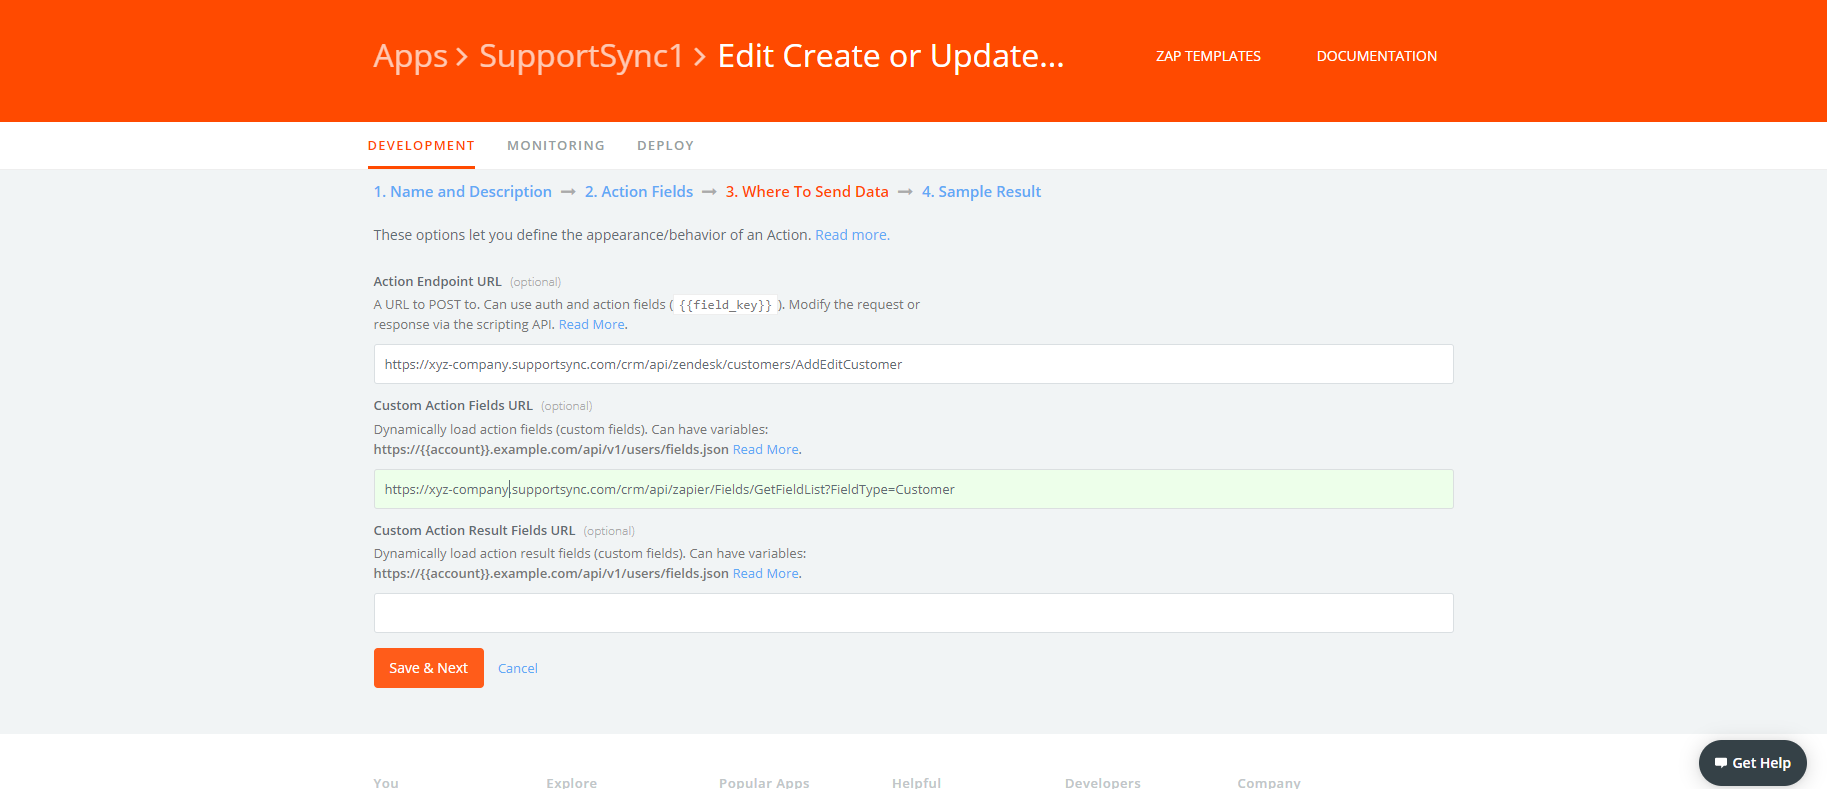
c) Enter the following for "Action Endpoint URL":
https://{{your-sub-domain}}.supportsync.com/crm/api/zendesk/customers/AddEditCustomer
d) Replace {{your-sub-domain}} with your brand's URL sub-domain.
e) Enter the following for "Custom Action Fields URL":
https://{{your-sub-domain}}.supportsync.com/crm/api/zapier/Fields/GetFieldList?FieldType=Customer
f) Replace {{your-sub-domain}} with your brand's URL sub-domain.
g) Click "Next".
h) Click "Save".
8. Add custom code to Scripting API. This is to translate the fields between Zapier and SupportSync.
a) Click "Edit Code".
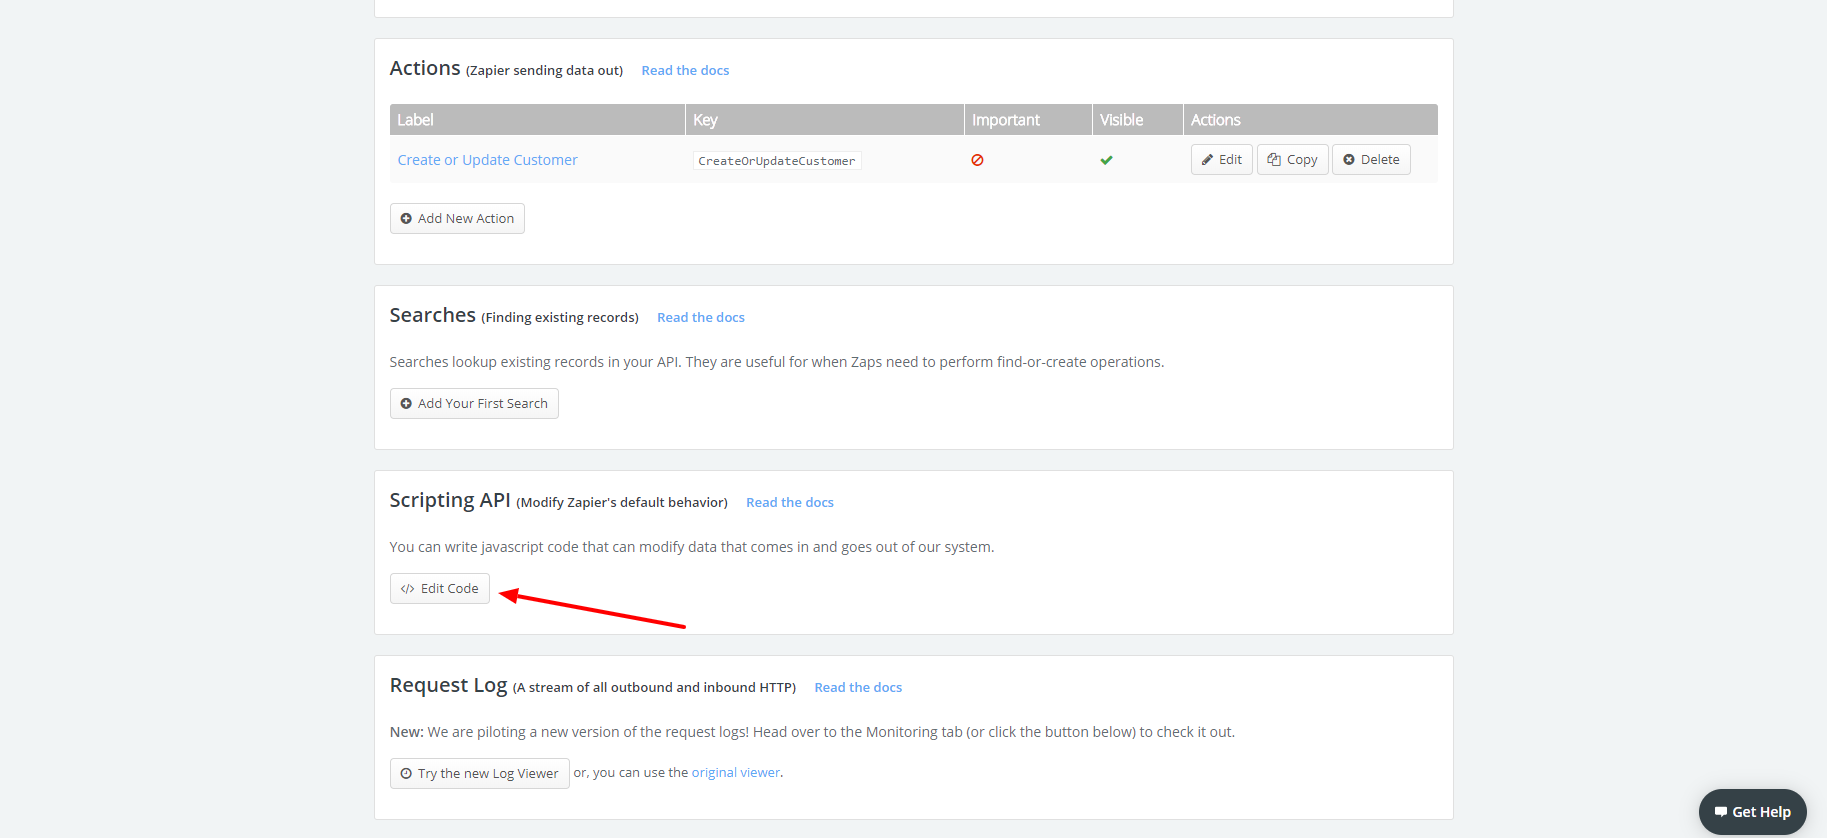
b) Replace the code in the box with that in the ZA.TXT attachment at the end of this article.
c) Click "Save".
The App is complete. You can use it in Zapier by searching for "SupportSync1" when you create a Zap.
Comments