
SupportSync helps your customer service agents quickly create, view and track product returns (RMA’s) in your Zendesk.
We provide customer service agents on the Zendesk platform with a simple, easy to use interface for quickly creating, viewing, editing and tracking returns that will synchronize support team members and customers throughout the return process. Customer service agents can remain within the Zendesk platform while utilizing the powerful features of the SupportSync application.
Below is an example of a customer search and his related Zendesk tickets. The customers RMA history in SupportSync is loaded in the application sidebar.
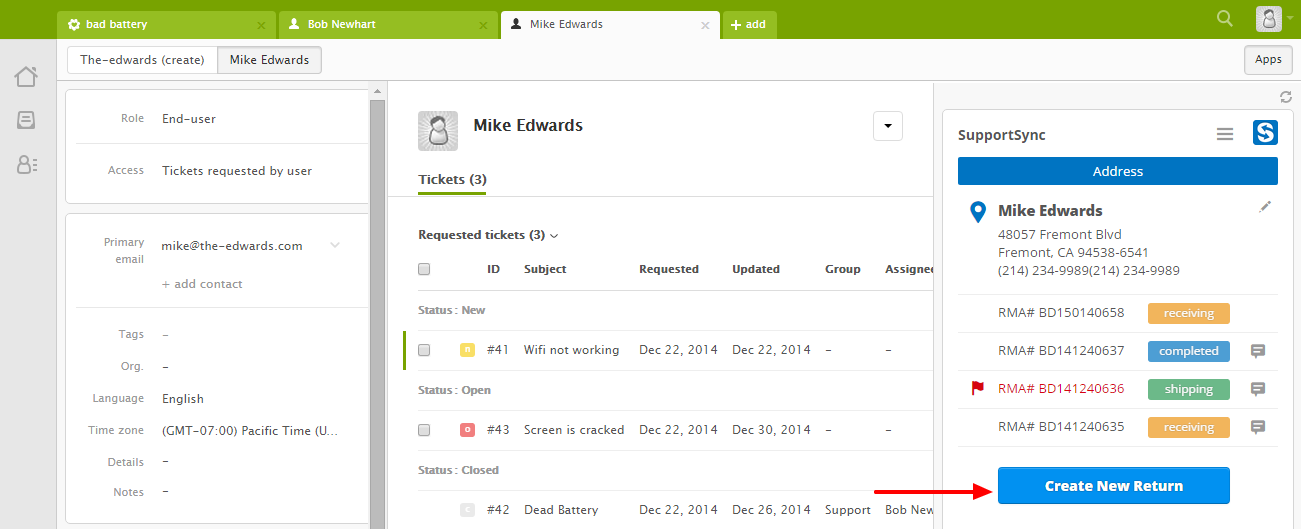
Lets create a new return. Simply click on the "Create New Return" button
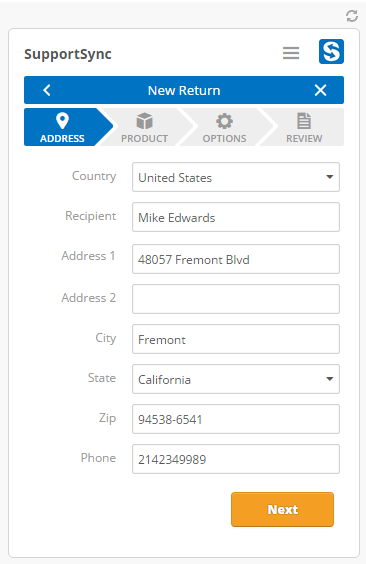
The Return Wizard takes you through 4 simple steps to create your return. The first step is entering the customers address. Our system has built-in type ahead features to quickly locate the address you're looking for and is also synchronized with the USPS database to assure the address is valid.
Click Next...
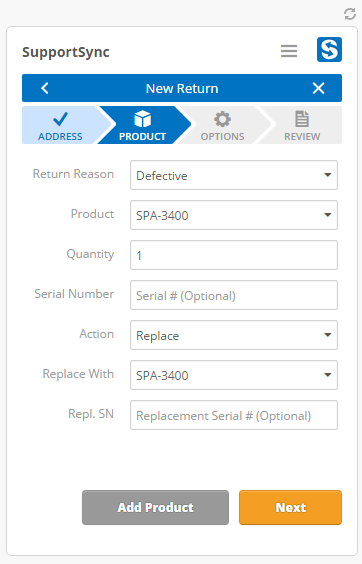
The next step in the Wizard is entering the Product details for the return. All of the drop down options (i.e. Return Reason, Product list, Actions etc) will be a reflection of your SupportSync settings.
Click Next...
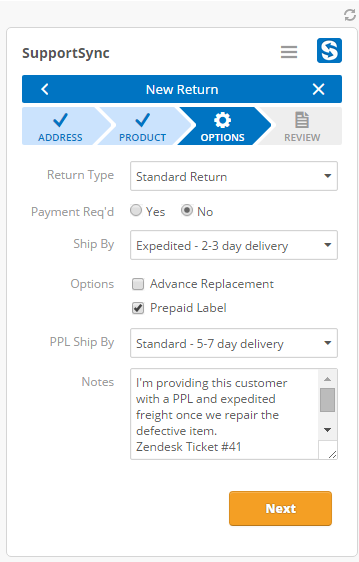
One the Options page, you select the return type, if a payment is required (and the amount), your predefined shipping methods, Options for Advance Replacements and Pre-Paid labels (and its shipping method) as well as any Notes. The Zendesk Ticket # could also be referenced here if desired.
Click Next...
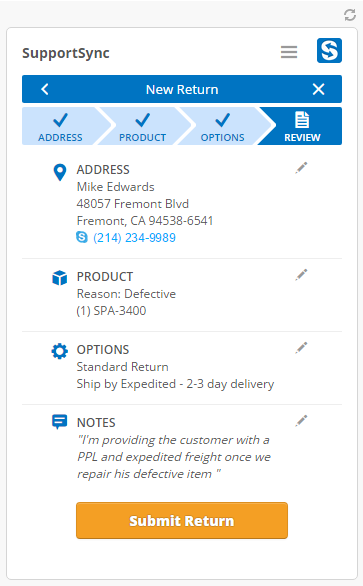
On the final Review page, you agents can review all the details and make any changes or corrections prior to submitting the return. If everything looks good, click "Submit Return" and your done!
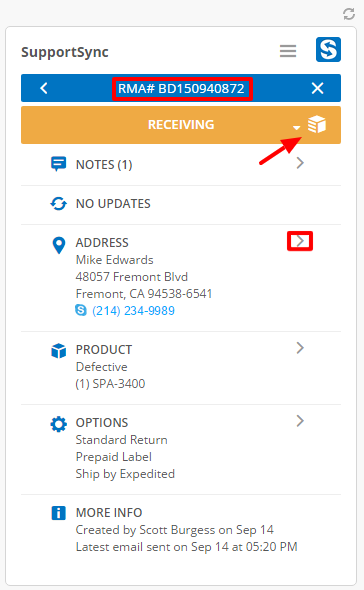
Now that you've created a return, the application reflects the newly created RMA # as well as all of the details on the return. You have the option make edits to the returns (>) such as adding new Notes or changing the Address or selecting other options from drop down icon.
Viewing a Return
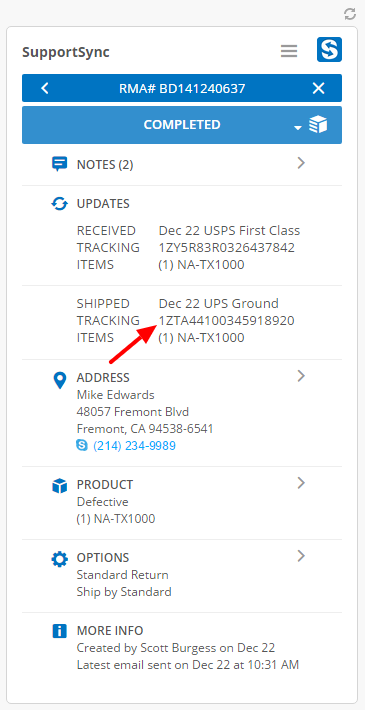
In addition the aforementioned options, by opening up a RMA record from the Customer view, you can quickly check the status of an RMA, click on a tracking # to connect with the carrier and track the package status.
Comments