We use the term "Bulk Returns" to refer to returns that typically are not single items from an end-user customer. Examples would be returns from your retailers, distributors, re-sellers or manufacturing partners.
You can treat these types of returns within your Brand as you would your end-user returns OR you can create a new Brand and separate these returns.
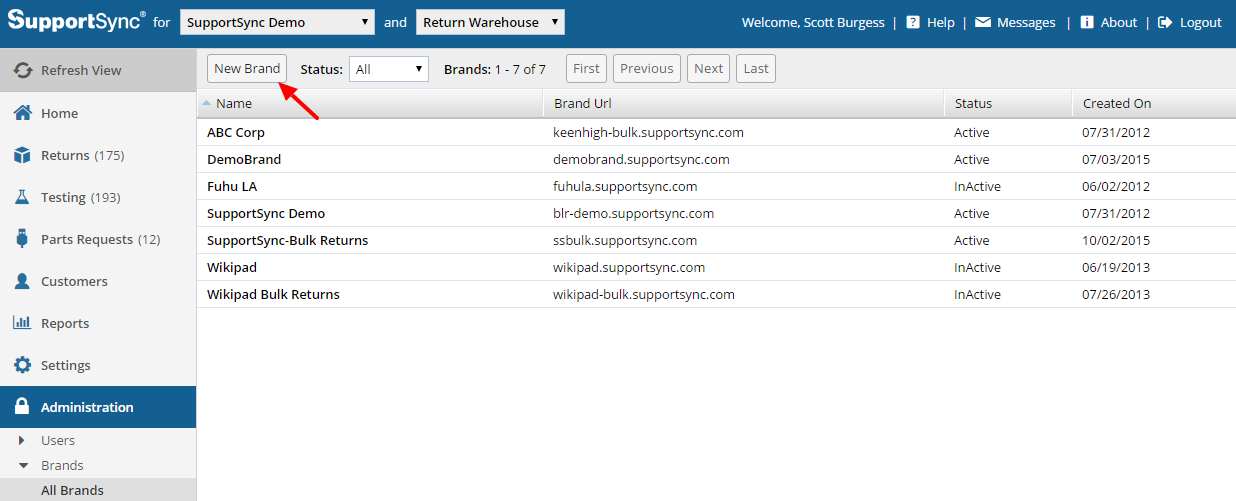
To create a new Brand:
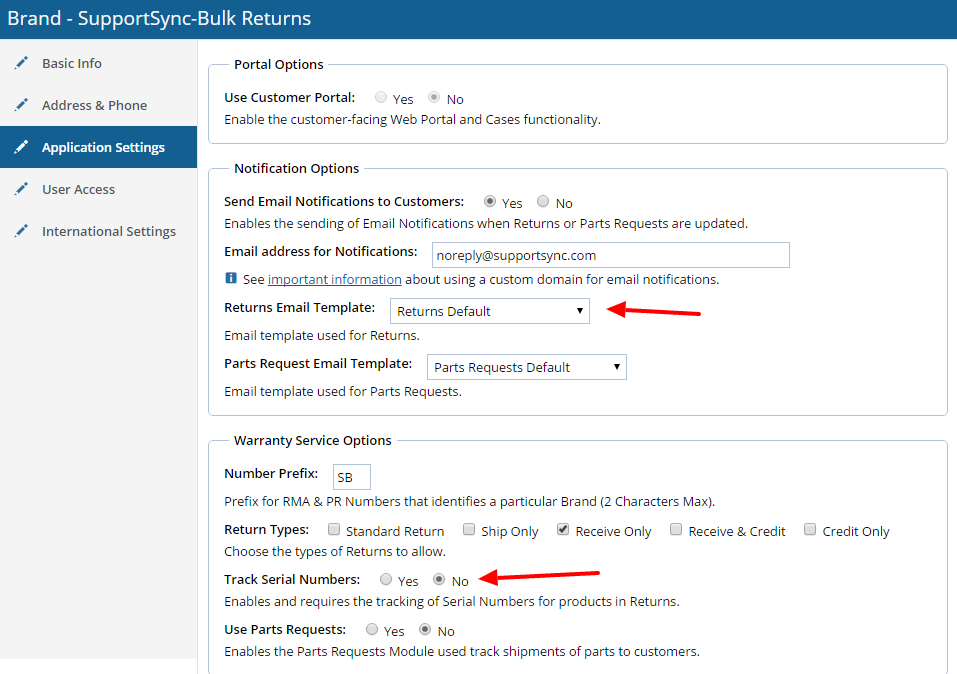
As the Admin, you can setup your new Brand settings with specific Email templates for your bulk returns, identify the Return Types such as "Receive Only" as well as decide if you wish to track serial numbers. Note, if you select "Yes" for Track Serial Numbers, you will need to enter the serial numbers for each item.
See the Application Settings under Brands below:
Once you've created your new Brand, you can now access each Brand from the drop down as illustrated below:

Creating a New Return
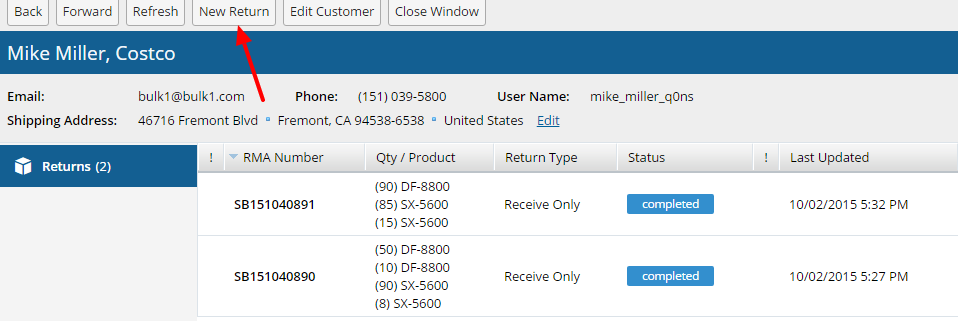
Creating a return is the same process as creating an end-user return. Select from a list of Customers you've already created or create a New Customer:

In the example below, we've selected an existing customer and we're going to create a New Return
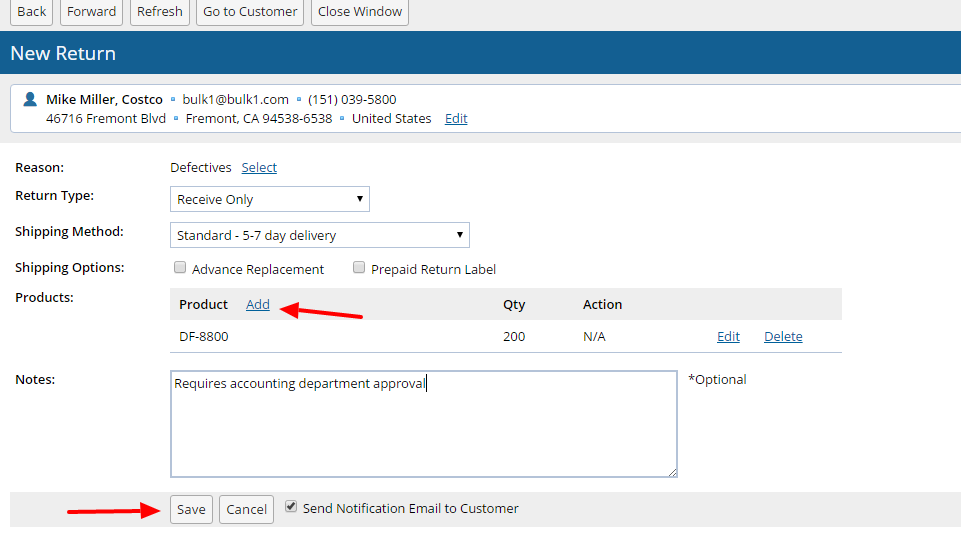
Below we've selected the the Reason, Return Type, Shipping Method, Shipping Options (if applicable) and the Product and Product quantity. Note, if there's more than one Product on the Return, click "Add" and select the Product and quantity for as many items as required. Once completed, click Save
When the Return is created it will be in "Receiving" Status awaiting physical receipt of the items. Once received, open the RMA and click "Receive" to receive the items in the system and record the actual amounts received.
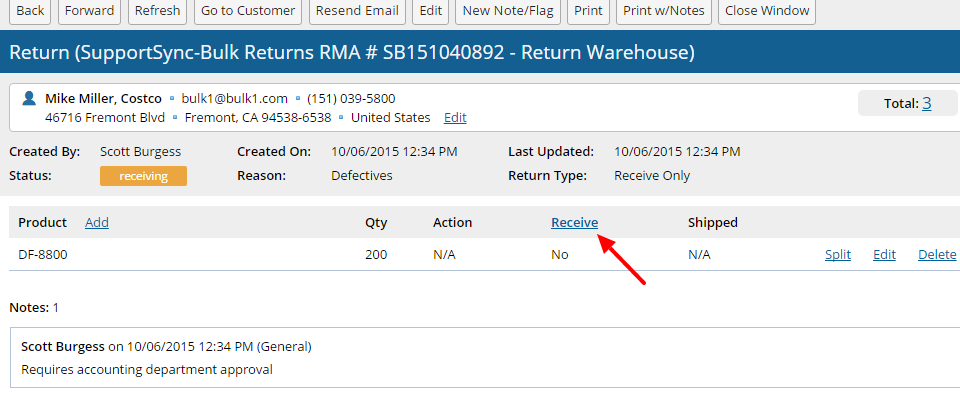
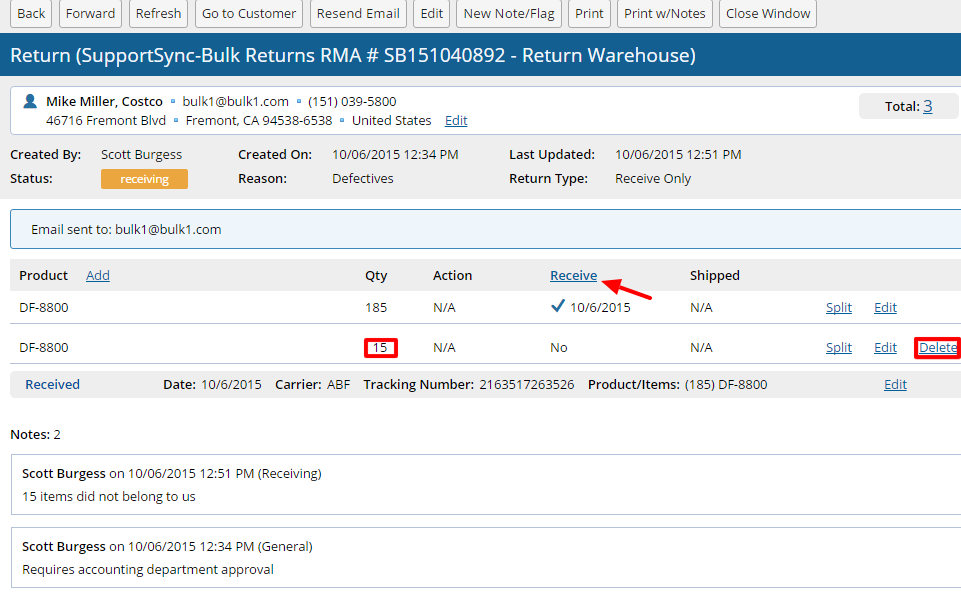
Below is an example of an instance where the quantity Requested on the RMA did not match the Actual quantity received. In this example, only 185 of the requested 200 units were authorized. Therefore, 185 units were received but the Return remains in "Receiving" status until the remaining 15 units are received OR Deleted. If the 15 remaining items are received or deleted, the RMA will move to a "Completed" status.

Comments